
![]()
![]()
CLIQUE
A dependency-free and extensible CLI library for beautifying Java terminal applications.
Why Clique?
Highlights
- RGB & Gradients - Full 24-bit color support with per-character gradient rendering. Ink docs
- no-color.org compliant - Respects the
NO_COLORenvironment variable out of the box. no-color.org - GraalVM compatible - Works with GraalVM native image, no reflection surprises.
- Better unicode emoji support - Emoji handling compliant with most Unicode emojis
Quick Start
Maven
<dependency>
    <groupId>io.github.kusoroadeolu</groupId>
    <artifactId>clique-core</artifactId>
    <version>4.0.2</version>
</dependency>
Gradle
dependencies {
    implementation 'io.github.kusoroadeolu:clique-core:4.0.2'
}
Features
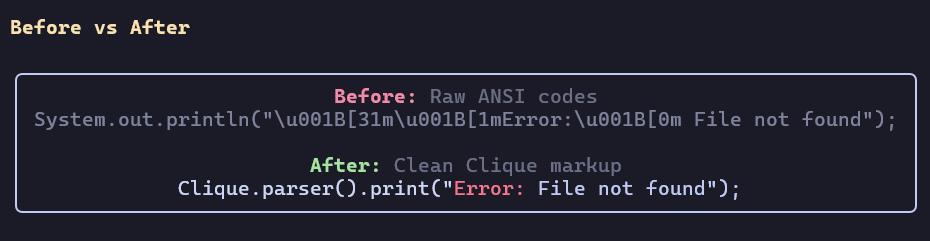
Markup Parser
Simple, readable syntax for styled text:
Clique.parser().print("[red, bold]Error:[/] Something went wrong");
Ink
A lightweight, chainable ANSI string builder — similar in spirit to Chalk. Each method returns a new Ink instance, so you can safely reuse base styles:
Clique.ink().red().bold().on("Error");

// Reusable base style
Ink bold = Clique.ink().bold();
bold.red().on("error");    // bold + red
bold.yellow().on("warn");  // bold + yellow. The original stays untouched

// Gradients
Clique.ink().bold().gradient("#FF69B4", "#6495ED").on("Gradient text");

Themes
Drop in popular color schemes with one line:
Clique.registerTheme("catppuccin-mocha");
Clique.parser().print("[ctp_mauve]Styled with Catppuccin![/]");
Built-in themes: Catppuccin, Dracula, Gruvbox, Nord, Tokyo Night.
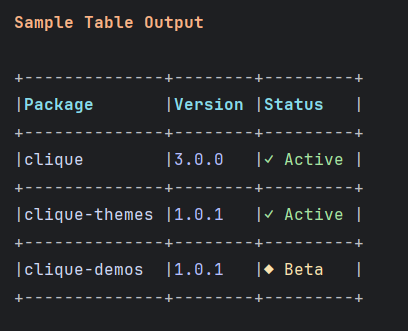
Tables
Build tables with multiple styles:
Clique.table()
    .headers("Name", "Age", "Status")
    .row("Alice", "25", "Active")
    .row("Bob", "30", "Inactive")
    .render();
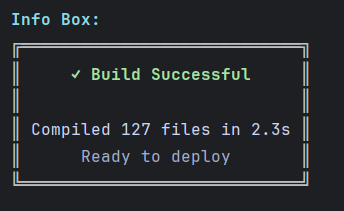
Boxes
Single-cell boxes with text wrapping:
Clique.box()
    .dimensions(40, 10) // Width, Height
    .content("Your message here")
    .render();
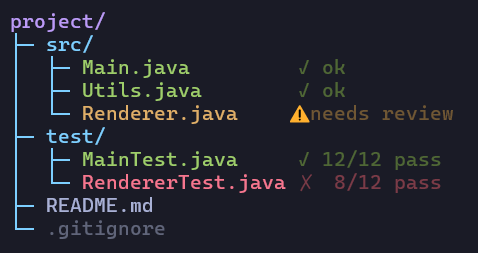
Tree
Display hierarchical data with clean connector lines:
Tree tree = Clique.tree("project/");

Tree src = tree.add("src/");
src.add("Main.java");
src.add("Utils.java");

tree.add("README.md");
tree.render();
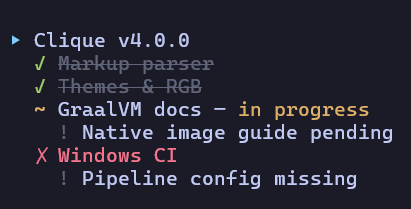
ItemList
Symbol-driven lists with nesting and full markup support. Config cascades from parent to sublists automatically:
Clique.list()
    .item("[green]✓[/]", "Auth service")
    .item("[yellow]~[/]", "Notification system — in review",
        Clique.list()
            .item("!", "Waiting on design sign-off")
    )
    .render();
Frames
Layout container that vertically stacks Clique components inside a border:
Clique.frame()
    .title("[bold]My App[/]")
    .nest(table)
    .nest(progressBar)
    .render();
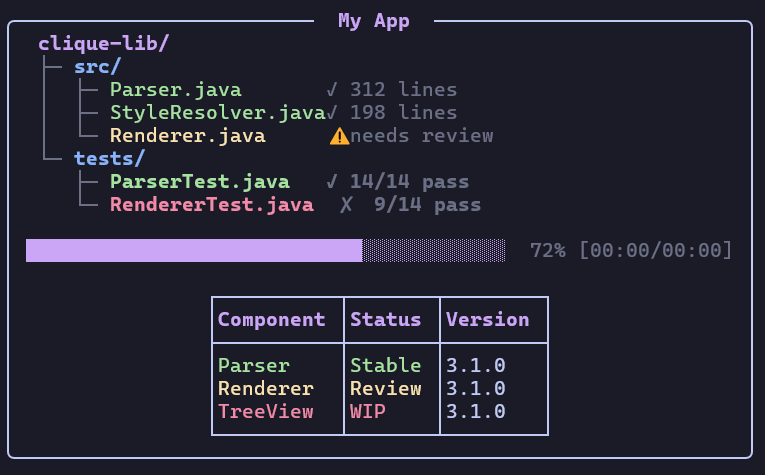
Progress Bars
Visual feedback for long-running operations - wrap a collection and the Clique handles the rest:
for (var file : Clique.progressBar(files)) {
    process(file);
}

Thread safety: Style registration/lookup and config objects (once built) are thread-safe. All other components are not — avoid sharing instances across threads.
Built with Clique
- Veneer — Syntax highlighting for Java, Python, Go, Lua, and JavaScript in the terminal
Documentation
- Full Documentation — Complete guides for all features
- Markup Reference — Colors, styles, and syntax
- Examples & Demos — Interactive examples
Try the Demos
git clone https://github.com/kusoroadeolu/clique-demos.git
cd clique-demos
javac src/demo/QuizGame.java
java -cp src demo.QuizGame
See clique-demos for all available demos.
License
Apache 2.0
Contributing
Contributions are welcome!