
eShop Reference Application - "AdventureWorks"
A reference .NET application implementing an e-commerce website using a services-based architecture with Aspire.
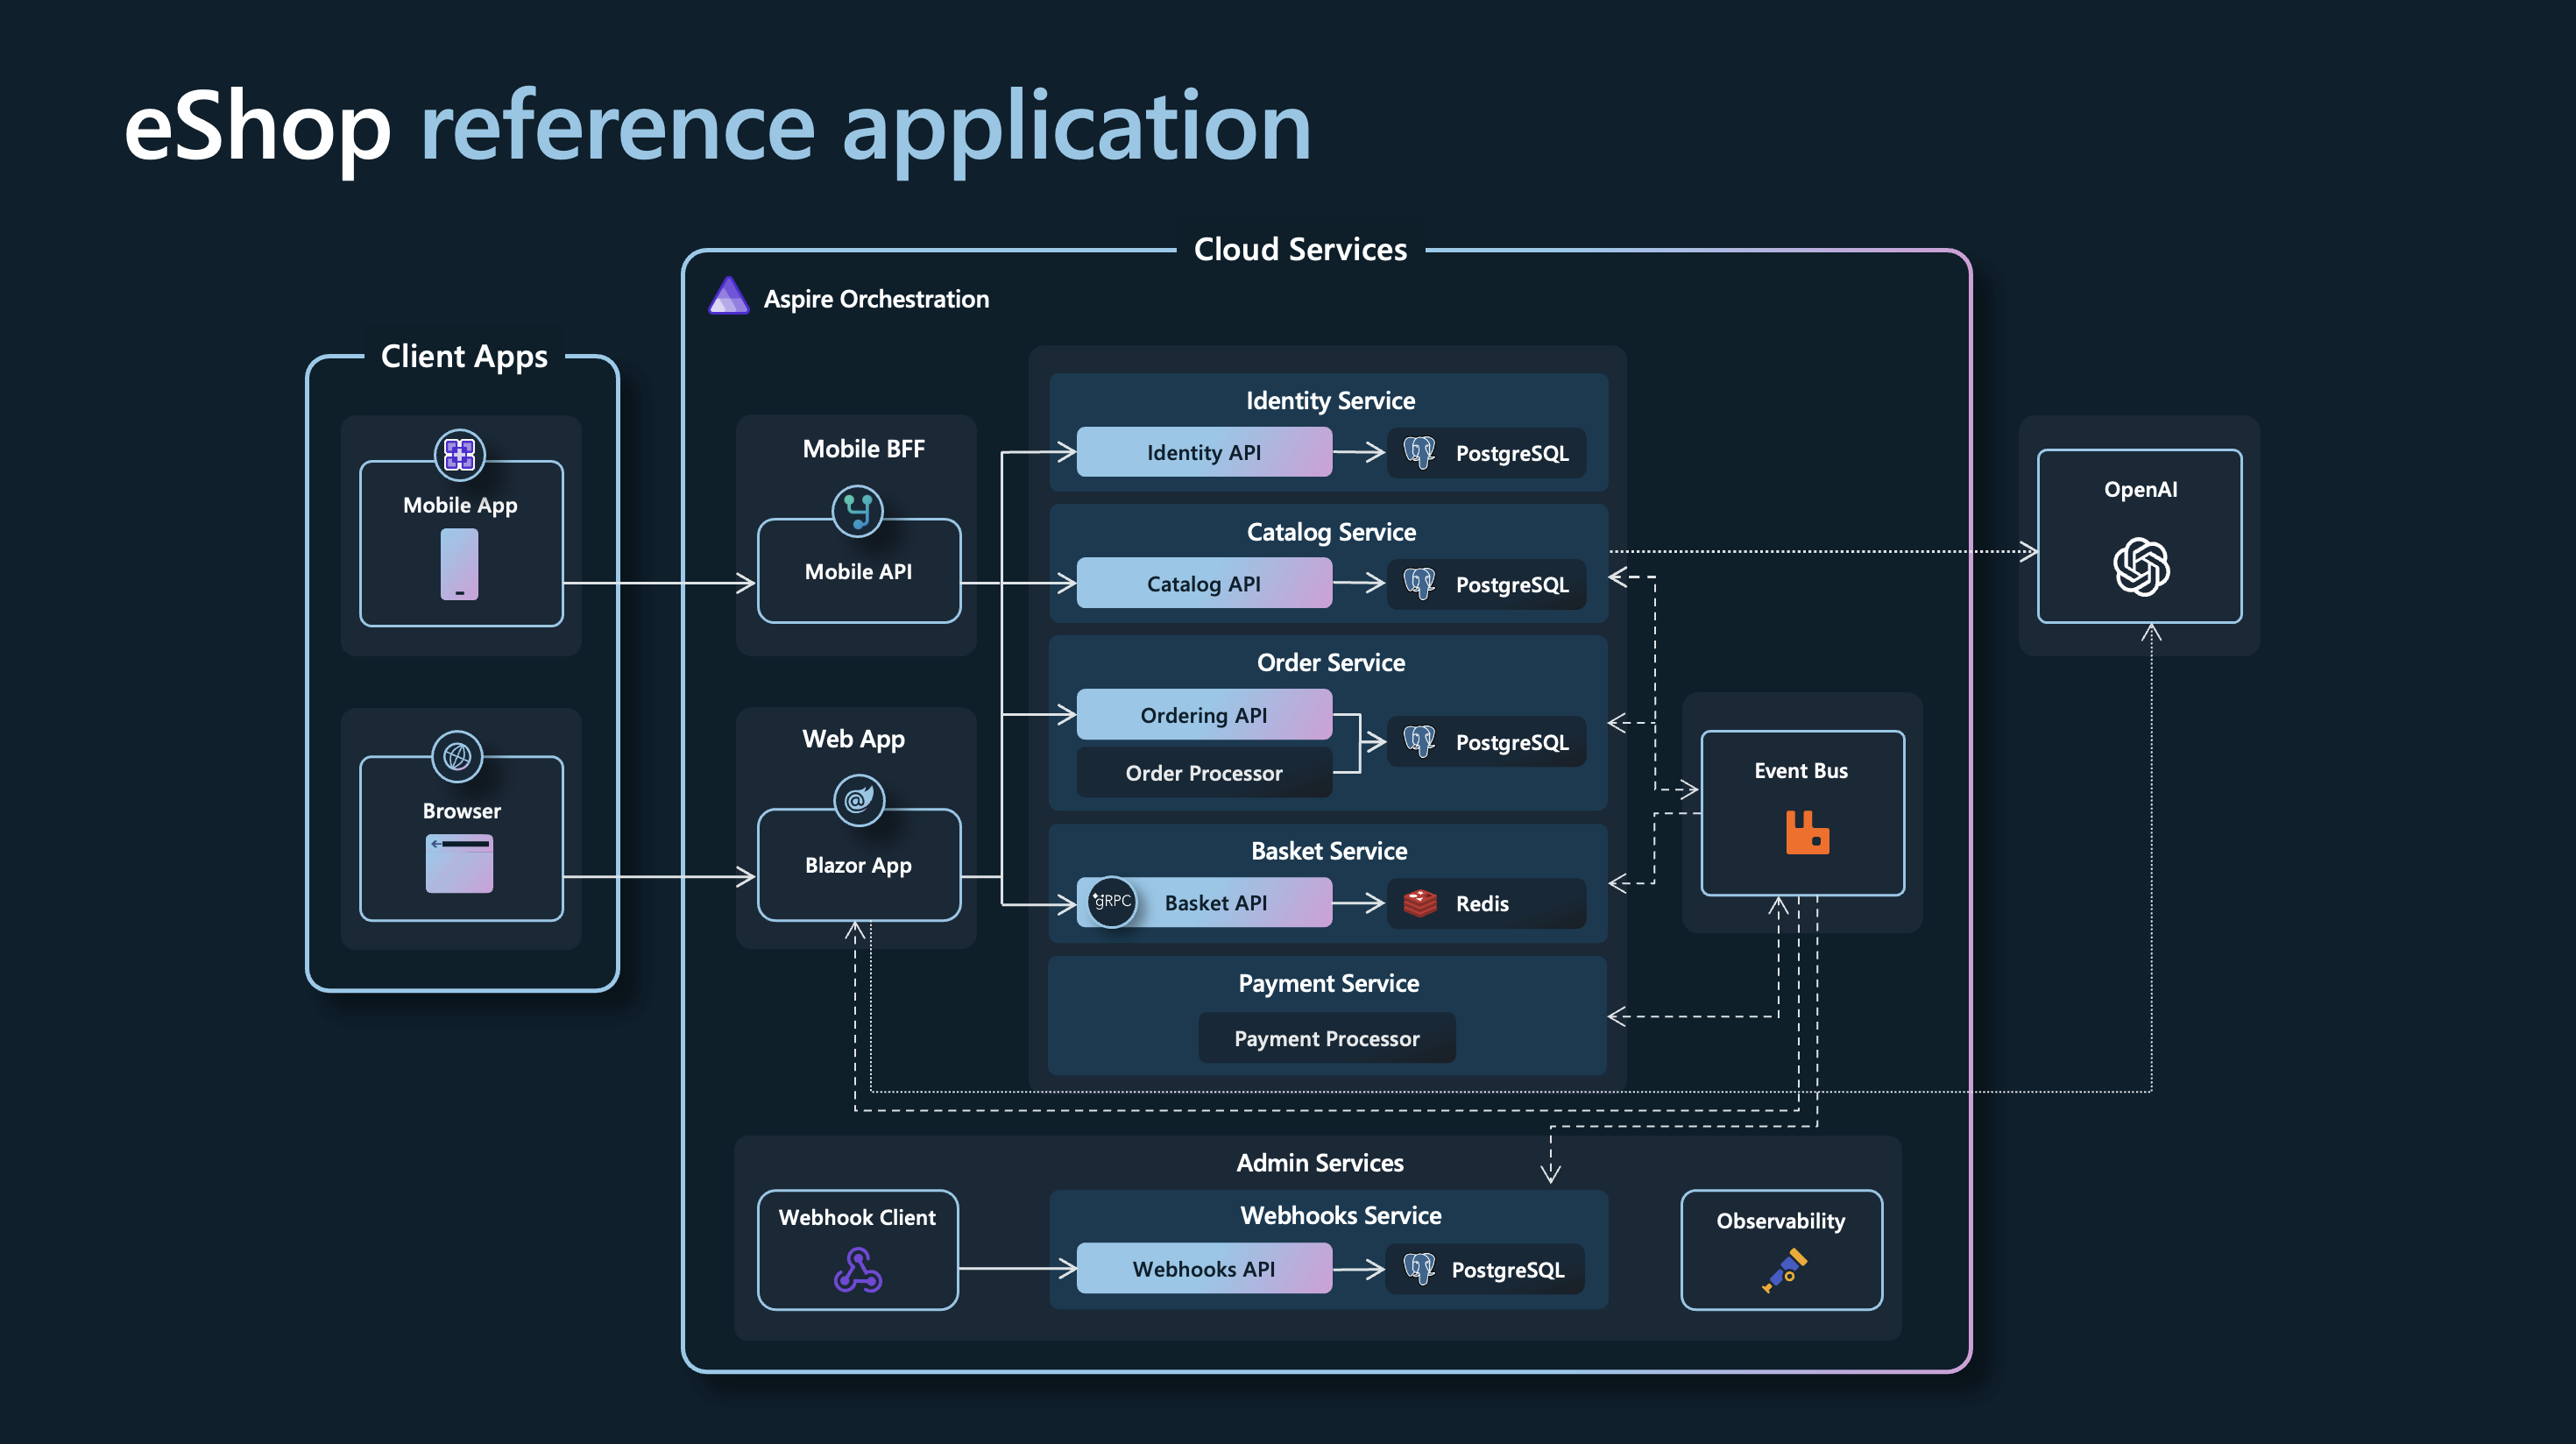
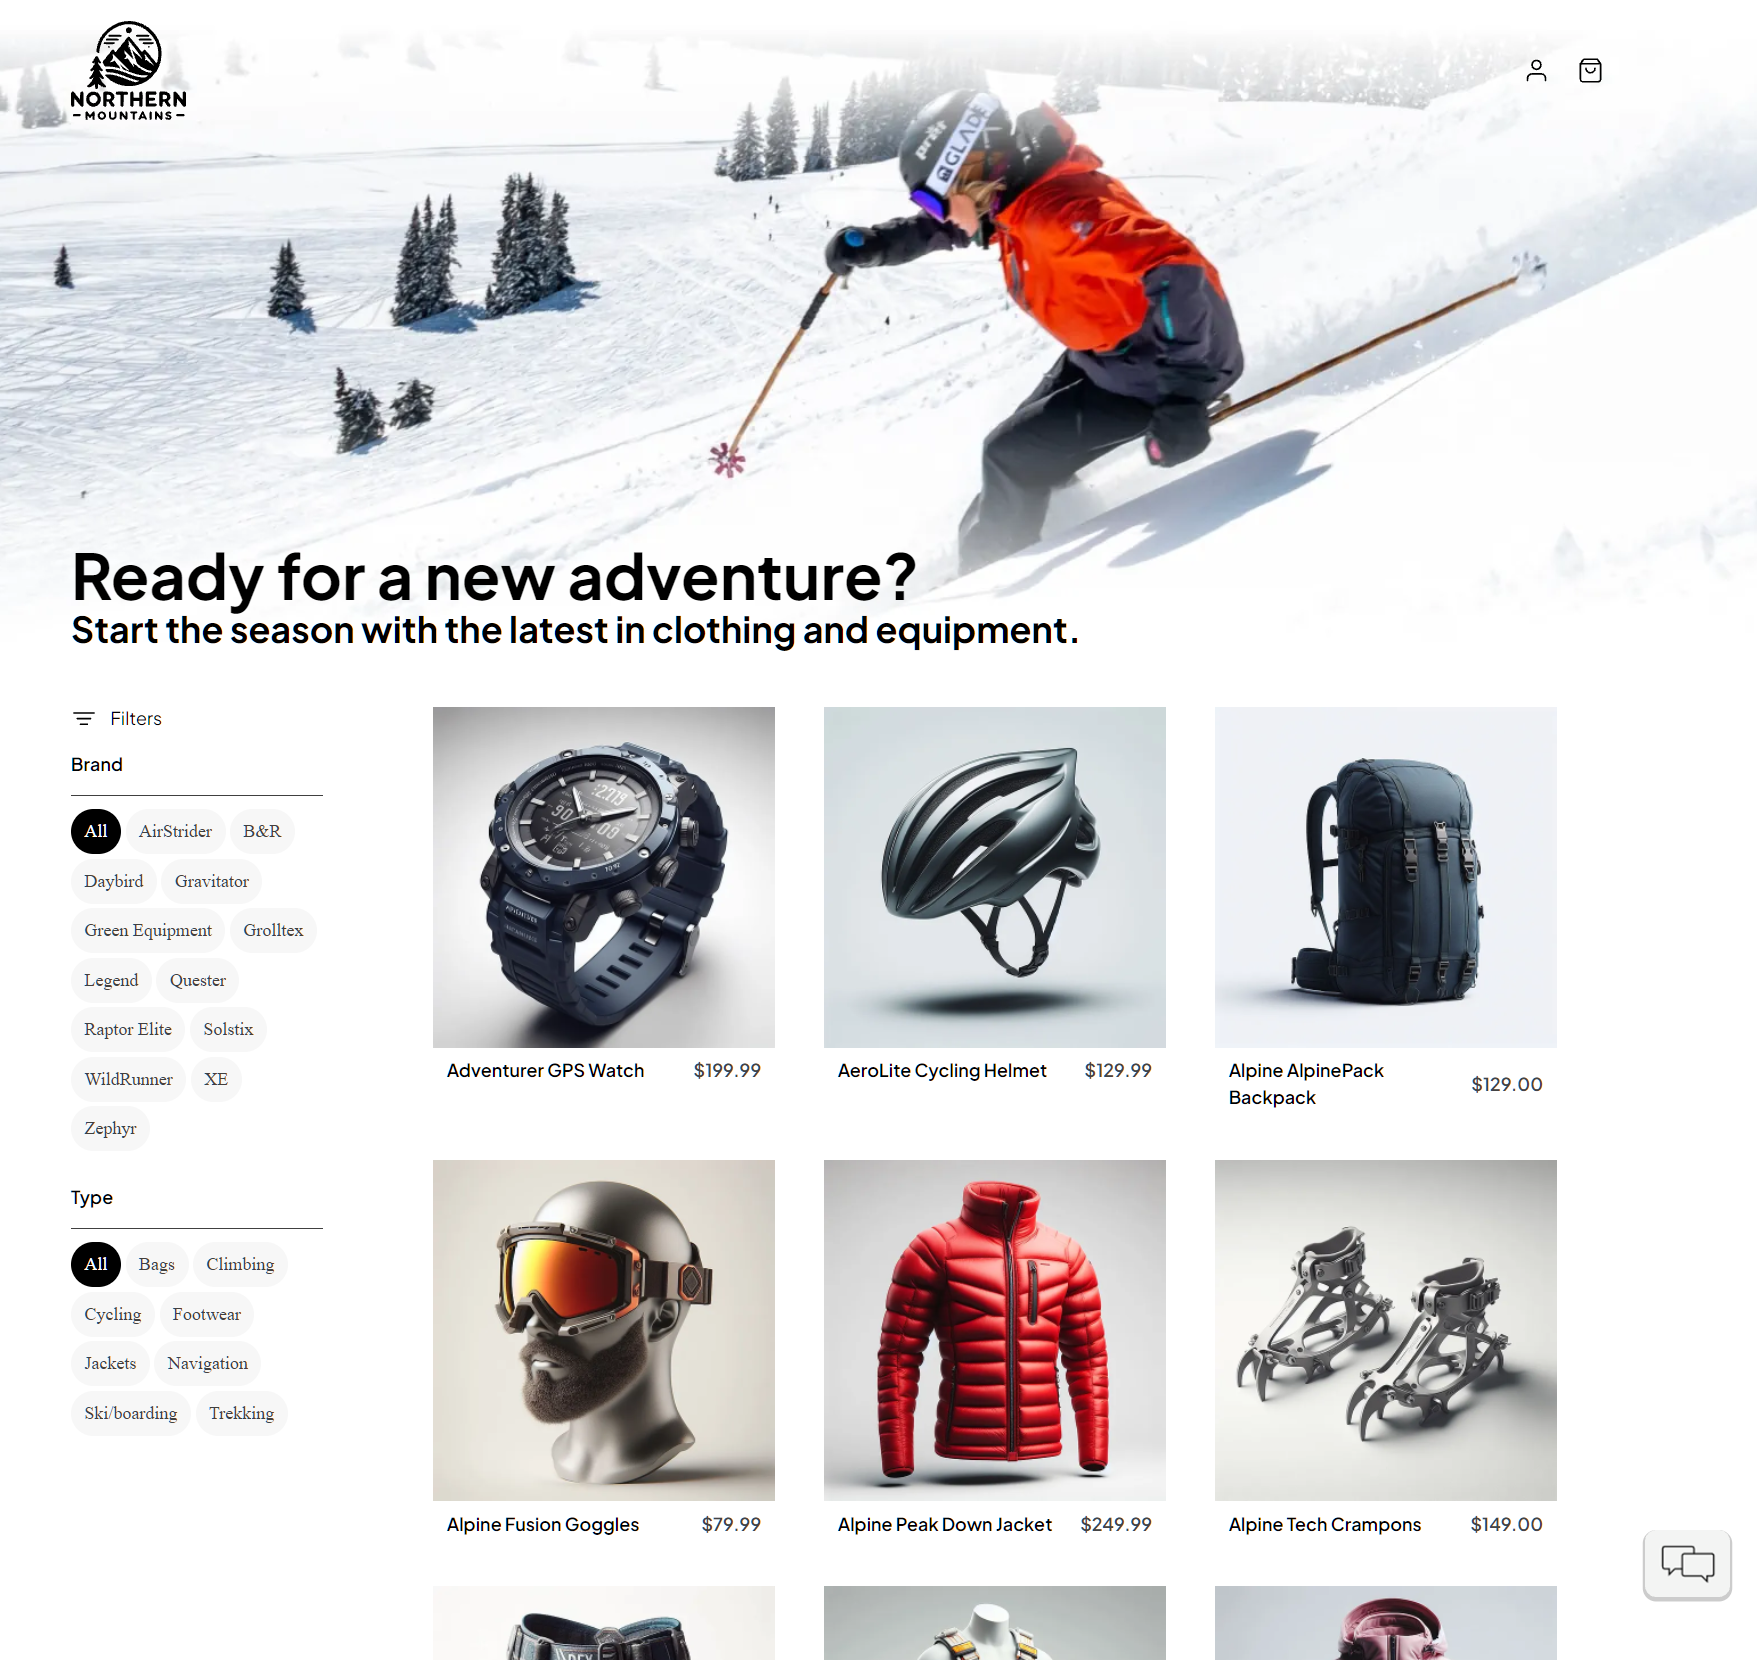
Getting Started
This version of eShop is based on .NET 10.
Previous eShop versions:
Prerequisites
-
Install a .NET 10 SDK that satisfies
global.json. -
Install the Aspire CLI and verify that it is available:
aspire --version -
Install and start an OCI-compatible container runtime. Docker Desktop is the recommended default. Podman is also supported; follow the Aspire prerequisites to configure it.
-
Clone the repository:
git clone https://github.com/dotnet/eShop.git
cd eShop
No separate Aspire workload or Visual Studio component is required; the AppHost SDK and hosting integrations are referenced by the projects in this repository.
Optional IDE setup
- Visual Studio with the
ASP.NET and web developmentworkload. - Visual Studio Code with C# Dev Kit and the Aspire extension.
- The .NET MAUI workload if you want to run the client apps.
Running the solution
[!WARNING] Ensure that your container runtime is running before starting eShop.
From the terminal
From the repository root, run:
aspire run
The root aspire.config.json selects src/eShop.AppHost/eShop.AppHost.csproj, avoiding ambiguity with the test AppHosts in the repository. When startup completes, the CLI prints a dashboard URL similar to:
Dashboard: https://localhost:<port>/login?t=<token>
Press Ctrl+C to stop the AppHost. See the aspire run command for additional options.
To run the AppHost in the background instead:
aspire start
aspire ps
When you are finished, run aspire stop. See the aspire start command for details.
From Visual Studio
- Open
eShop.Web.slnf. - Set
src/eShop.AppHost/eShop.AppHost.csprojas the startup project. - Press Ctrl+F5 to start eShop and open the Aspire dashboard.
Running tests
Run the server tests:
dotnet test --solution eShop.Web.slnf
Run the Playwright browser journeys. Playwright starts the AppHost automatically, so ensure your container runtime is running first.
npm ci
npx playwright install chromium
npm run test:e2e
Optional: AI Chatbot with Microsoft Foundry
This option provisions a Microsoft Foundry resource during local development, so first authenticate to Azure and configure the subscription and location:
az login
aspire secret set "Azure:SubscriptionId" "<subscription-id>"
aspire secret set "Azure:Location" "eastus"
Then enable Foundry and start eShop:
$env:UseFoundry = "true"
aspire run
Aspire provisions the gpt-4.1-mini and text-embedding-3-small deployments and injects their connection information into the consuming projects. The Foundry hosting integration currently uses a preview package. See local Azure provisioning and the Microsoft Foundry hosting integration for details.
Deploy to Azure Container Apps
The AppHost is already configured with an Azure Container Apps environment, so the Aspire CLI can deploy directly from the application model. See the Aspire Azure Container Apps deployment guide for details.
[!WARNING] This sample deploys PostgreSQL, Redis, and RabbitMQ as containers in Azure Container Apps. This configuration is intended for evaluation and demonstrations, not production data.
Prerequisites:
- The prerequisites listed above, including a running container runtime.
- The Azure CLI, an active Azure subscription, and permission to create resources.
Sign in, optionally preview the deployment pipeline, and deploy:
az login
aspire deploy --list-steps
aspire deploy
For local interactive use, aspire deploy prompts for missing Azure settings. For non-interactive use, provide them explicitly:
$env:Azure__SubscriptionId = "<subscription-id>"
$env:Azure__Location = "eastus"
$env:Azure__ResourceGroup = "rg-eshop-demo"
aspire deploy --non-interactive
Use aspire publish when you need deployment artifacts for inspection or another deployment tool. Running it first is not required: aspire deploy invokes the deployment pipeline and its dependencies directly rather than consuming an earlier publish output.
When you no longer need the deployment, run aspire destroy. This deletes the entire configured resource group, including resources that Aspire did not create, so review the target carefully before confirming.
Contributing
For more information on contributing to this repo, read the contribution documentation and the Code of Conduct.
Sample data
The sample catalog data is defined in catalog.json. Those product names, descriptions, and brand names are fictional and were generated using GPT-35-Turbo, and the corresponding product images were generated using DALL·E 3.
eShop on Azure
For a version of this app configured for deployment on Azure, please view the eShop on Azure repo.